


Herbal Learning
It’s Time To Build A Fantastic Garden Box! Cheap! Easy! Fun! What Could Be Bad?
Doc & Davis here, from the HomeGrown Herbalist School of Botanical Medicine.
Spring has sprung, and with it comes the thrill of gardening season! It’s that exhilarating yet slightly daunting time of year when we’re all eager to roll up our sleeves, dig into the soil, and cultivate our own little patches of self-sufficiency. Whether it’s growing crunchy veggies or nurturing medicinal herbs for our loved ones, the question that often pops up is…where do we begin?
An excellent first step to becoming a self-sufficient gardener is setting up your own garden box. This style of gardening provides a controlled environment where you can nurture your plants, giving you the ability to manage the soil, water, weed control, and nutrient conditions more effectively.
Creating your own garden box can seem intimidating, especially if you’re new to gardening. But with the right instructions, it’s an endeavor anyone can undertake. This tutorial provides a thorough guide to constructing your very own garden box from scratch, even if you’re not familiar with the process. Follow these steps, watch our accompanying video tutorial, and before you know it, you’ll have a functional and durable garden box ready for planting.
Materials Required:
Let’s begin by identifying all the materials you’ll need for this project.

- 4x Planter wall blocks: These are the building blocks of your garden box. They are specially designed for this purpose, with pre-set holes and a natural aesthetic that will blend well into your garden.
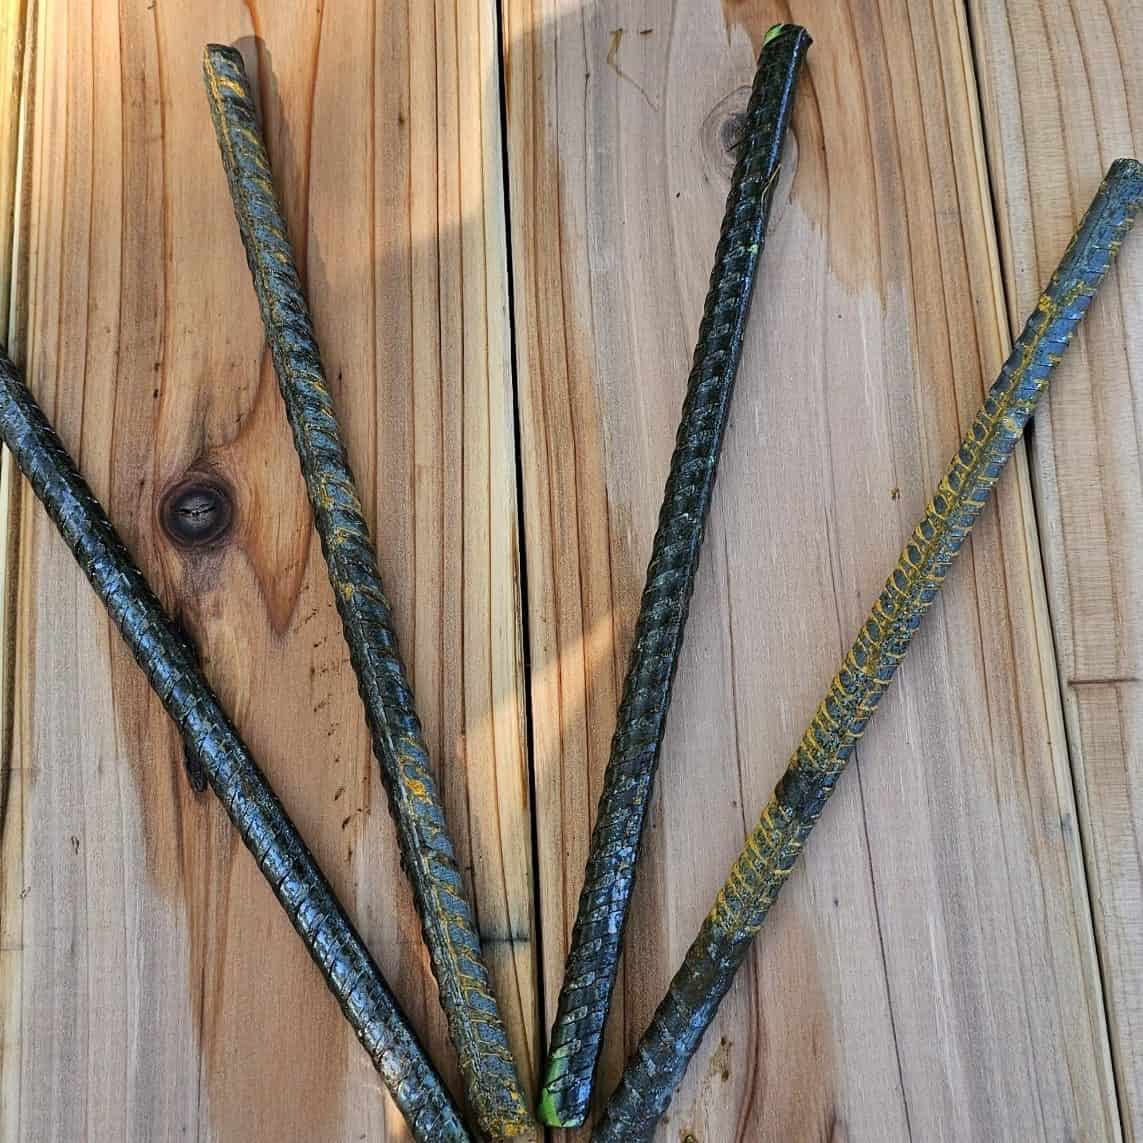
- 4x Rebar: These metal rods are used to secure the planter wall blocks in place. You will need four pieces of half inch rebar to complete the project. The rebar should be at least 6″ longer than the height of the finished box.
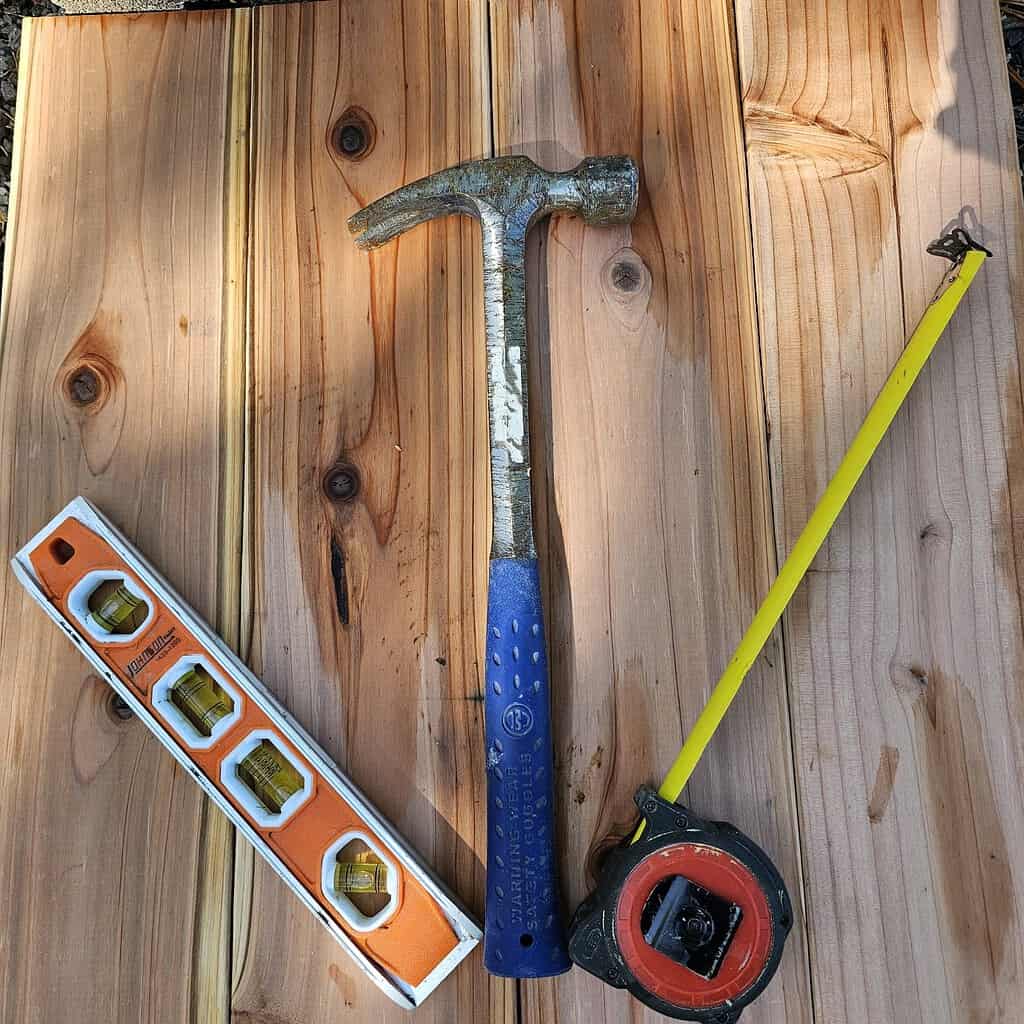
- A level: An essential tool to ensure that your box is perfectly horizontal. This is important because it helps maintain uniform water distribution when watering your plants.
- Tape measure: Precision is key in this project, and a tape measure is your best friend for achieving it.
- Hammer: You’ll need this to drive the rebar into the ground.
- 2x 8 foot long 2×6 boards: We recommend Redwood for its durability and resistance to outdoor weather conditions. You’ll need the boards to be cut into two lengths. 2 pieces measuring 2 feet and two measuring 6 feet.
- Shovel: For preparing the soil in your new garden box.
These materials are easily available at local hardware stores.
Step-By-Step Process:
Step 0.5: Level Your Soil:
Before you even begin positioning your blocks and planks, it’s essential to prepare the ground for your garden box. Start by marking out the exact area where your box will sit. Next, using a shovel or rake, level the soil within this marked area. This ensures that your garden box will sit flush against the ground, reducing gaps that pests and unwanted seeds could use to get into your box. It’s also essential for ensuring proper water drainage from your box. This is an often-overlooked step that can greatly enhance the performance and longevity of your garden box.
Step 0.75 (Optional but recommended): Apply Shou Sugi Ban Technique:
Shou Sugi Ban is an ancient Japanese technique for preserving and finishing wood. It involves charring the surface of the wood, which not only protects it from elements like moisture, insects, and UV rays, but also provides a distinctive, beautiful finish. While this step is optional, it can significantly enhance the durability and aesthetics of your wooden garden box.
- Safety First: Always prioritize safety when working with fire. Wear protective clothing and work in a well-ventilated, open area away from flammable materials. Have a fire extinguisher on hand.
- Char the Wood: Using a propane torch, carefully char every surface of the wooden planks. Hold the flame to the wood until it has a uniform, blackened appearance. Ensure you’re burning the surface enough to create a layer of char, but not so much that the wood is consumed. Be sure to char all surfaces.
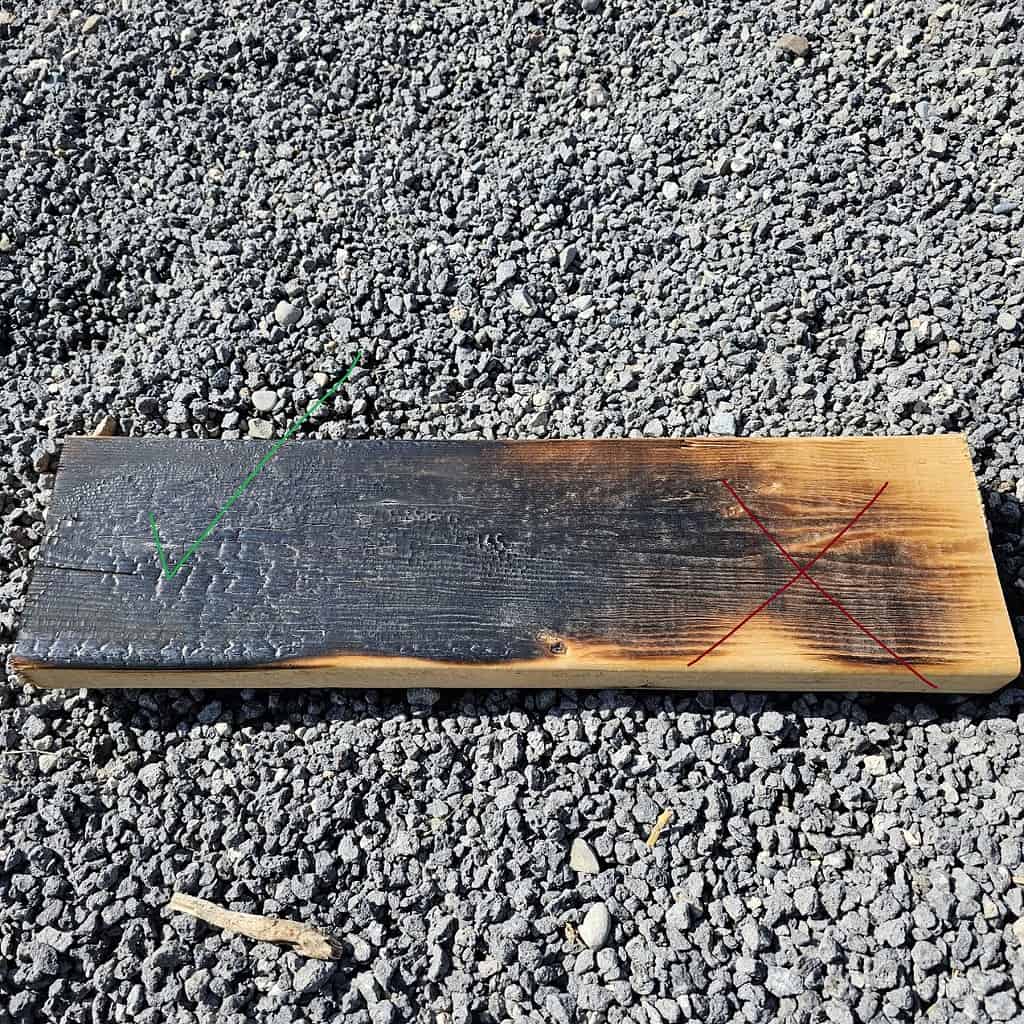
- Let it Cool: Once all planks are charred, let them cool down naturally. This could take some time, so patience is key.
Understanding the Carbon Layer:
When wood is charred using the Shou Sugi Ban technique, a layer of carbon is created on its surface. This carbon layer plays a vital role in the preservation and protection of the wood.
- Nature’s Protective Layer: The carbon layer is like Mother Nature’s own protective coating. It’s incredibly resilient and helps protect the wood from external elements. Carbon, being the result of a chemical reaction with fire, is less prone to additional chemical reactions. This means that the carbon layer is highly resistant to various forms of decay such as rot and fungus, which are common problems in outdoor wooden structures.
- Resisting Insects: The layer also acts as an insect deterrent. Many common wood-boring insects avoid charred wood, helping to maintain the integrity of your garden box over time.
- UV Protection: The charred surface helps to reflect UV rays, protecting the underlying wood from the harsh effects of the sun, which can cause regular wood to gray and weaken over time.
- Moisture Barrier: The carbon layer formed by the Shou Sugi Ban process also helps to repel water, making the wood more resilient to weathering. While it won’t make the wood completely waterproof, it does decrease the amount of moisture absorbed by the wood, helping to reduce warping and extending the life of your garden box.
- Fire Resistance: Interestingly, the process that involves charring the wood actually increases its fire resistance. The carbon layer that forms on the surface when wood is burned acts as a kind of insulation, slowing the spread of fire to the unburned wood beneath.
The Shou Sugi Ban carbon layer provides myriad benefits that can greatly extend the life of your garden box, while requiring less maintenance compared to other wood treatments. The added aesthetic appeal is a beautiful bonus. This age-old Japanese technique offers a perfect blend of function and form, making it a worthy consideration for any outdoor woodworking project. Keep in mind, though, that while the Shou Sugi Ban technique extends the life of the wood, it isn’t a one-time, permanent solution. Over many years, the charred surface may start to wear off and could require a fresh treatment to maintain its protective benefits.
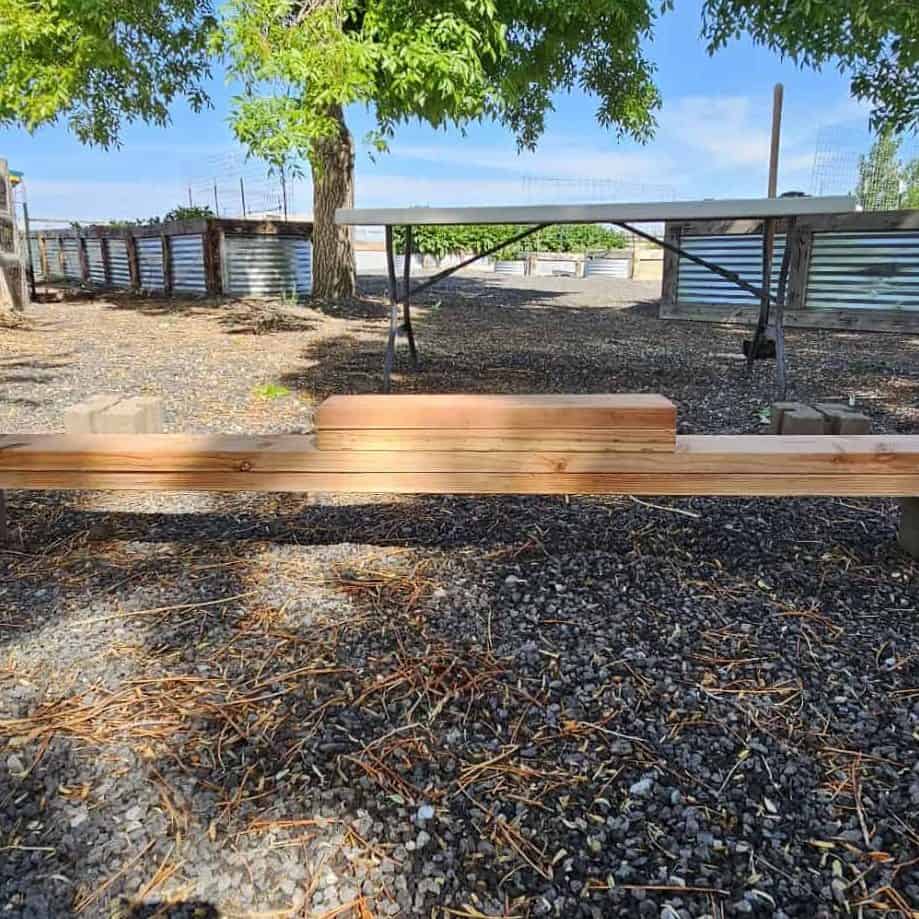
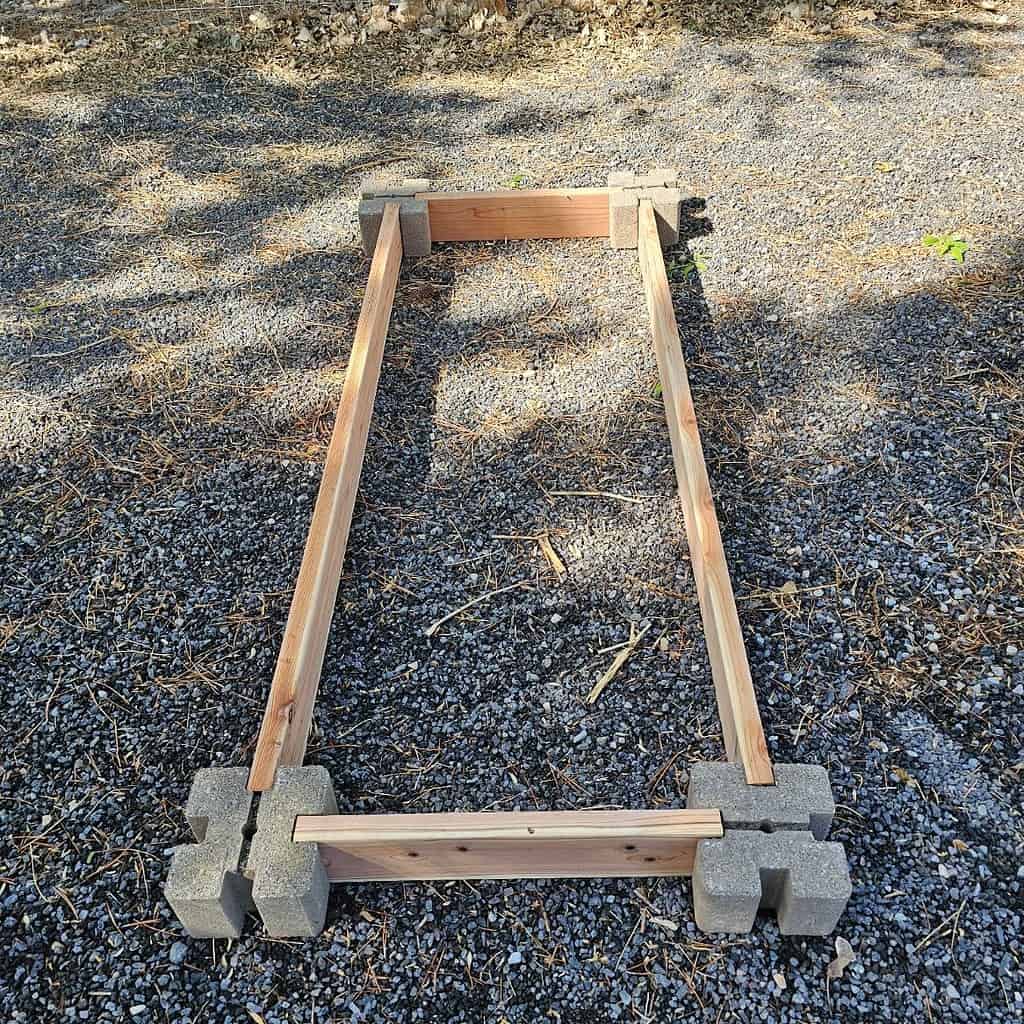
Step 1: Plan Your Layout:
Begin by arranging the planks to form the frame of your garden box. In this case, the two 8-foot planks form the length, and the 2-foot planks form the width. If you prefer a different size, feel free to adjust these measurements. The blocks and rebar will hold these planks in place. (Note – the box pictured below was laid on a gravel walkway and not over prepared ground for illustration purposes.)
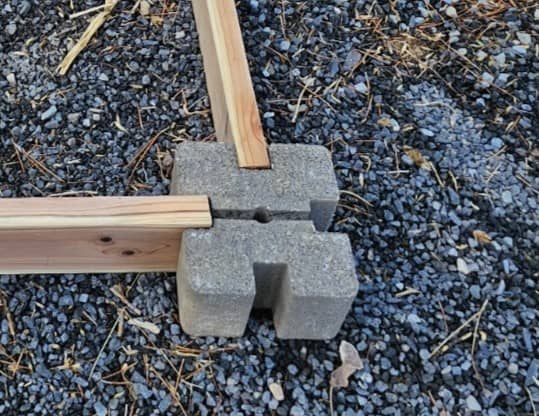
Step 2: Position the Planter Wall Blocks:
Once you’re satisfied with the layout of your wooden planks, it’s time to position your planter wall blocks. These will go at each corner of your planned box. If the ground is uneven, take the time to level it out – a lopsided box can affect the distribution of water, the health of your plants, and the aesthetics of your garden.
Step 3: Verify Your Alignment:
Now that your blocks are positioned, measure diagonally from corner to corner. This is to ensure that your box is perfectly square. If the measurements don’t match, adjust your blocks until they do. This step may seem tedious, but a well-aligned garden box will be sturdier and more aesthetically pleasing.

Step 4: Secure Your Blocks:
With your blocks positioned and aligned, you’ll want to secure them using the rebar. Each block should have a pre-set hole in it. Simply insert a piece of rebar into each hole and hammer it down until it is firmly in place. The rebar should go deep into the ground for stability (at least 6 inches deep).
Step 5: Increase the Height (Optional):
If you find that your box isn’t tall enough, you can add more blocks, wood, and use longer rebar for additional height. This is entirely up to you and the type of plants you wish to grow. Taller boxes will require longer rebar for stability.
Step 6: Prepare the Soil:
Before you add soil to your box, use your shovel to aerate the ground within the box. This involves breaking up the soil, especially if it’s clay-based, to create a more favorable environment for root growth. Proper soil preparation can greatly enhance the health and productivity of your garden.
Step 7: Fill Your Box and Start Planting:
Now it’s time to fill your garden box with soil that suits your plants’ specific needs. Once the soil is in place, giving it a gentle watering will help settle it down. To ensure even water distribution among all the plants, take a moment to gently smooth the surface, making it nice and level before planting.
Your box is now ready for planting. You can grow a variety of plants, such as vegetables, herbs, or flowers. The choice is yours! Simple right?
Remember, these boxes are easily disassembled and moved if necessary, making them perfect for renters or those who may relocate in the near future.
Final thoughts
There’s a unique joy in interacting with nature, from preparing the soil and planting seeds to caring for young sprouts and finally enjoying the fruits of your labor. Now that you’re equipped with the knowledge to create a basic planter box, it’s time to venture outdoors and start your journey with herb gardening!
If you find yourself intrigued by the prospect of deepening your understanding of herb cultivation and harvesting, you might want to consider enrolling in The HomeGrown Herbalist School of Botanical Medicine. We have lessons on gardening, harvesting and processing herbs as well as mountains of lessons on individual plants and their growing requirements. So why wait? Embark on this exciting journey with us and discover the wonders of the botanical world!

Wow, thank you for sharing such helpful information for free with your gratitudinous audience. You are warmly appreciated.
That is a great way of doing it! Thanks for sharing and for specifying how to ‘burn’ it, I’d heard about that method but was not aware how much to blacken it, so thanks for sharing that detail!
When you char the wood….do you do all sides? Or just the side that is against the dirt?
Char all the surfaces. :0)
Thank you for all the work you both (crew) put into this video. More please.
Question regarding the charring. With the intense rays of heat now-a-days, will the charred wood catch on fire easier? We live in wildfire area (NE tip of Oregon), is this a concern?
Thank you for your time!
May your spring and summer be abundant in health and garden blessings,
Wendy
Shou Sugi Ban unexpectedly makes the wood quite resistant to fire. Here is a good article on the subject:
https://nakamotoforestry.com/the-science-behind-flame-retardancy-of-shou-sugi-ban-yakisugi/
Wow! Wow! Wow! I had no idea, thank you, we shall rethink our homes siding in the future and possibly roofing. INTERESTING in the least. Thank you for passing on this information.
Happy gardening and heat treating your wood (Shou Sugi Ban),
Wendy
So very interesting, thank you!
I have never seen those corner blocks before, thanks for the info.
I would like to see how you made those metal boxes in the background. Is that metal roofing? How many years do they last? Thanks!
We’ll do a video on those
Thank you!!
We have used those concrete blocks for our raised beds. I have never heard of charring the wood. That is nice to learn.
I am almost 72yo and my property has a 24 x 44 slab of concrete in the middle of what my dad used as a garden. That is the best sun area. I have the idea that would be the perfect place to put in boxes. The concrete is not level (has some good depth puddles after a rain). How would I level that and secure the boxes. I would like them at least a foot high (maybe more to sit on the edges). Would maybe a spray foam insulation around the bottom with some pen holes for drainage work? and would maybe the 12-18 inches be enough weight to keep them in place? If this works it will be vegies, herbs, editable flowers and chicken feed. I am in Illinois zone 6B.
Thanks for your help, Della
We’ve been using these for a few years, we rent. The owner asked us to move our garden and it was not difficult… even the rich soil we had created was moved over in a wheelbarrow. Yay!!
I love your blogs, I’m learning so much from you! I heard about an herb that I want your opinion on, it’s called Nigella Sativa. I hear it’s a miracle herb, does everything just about. You make learning herbs so easy, you’re a very good teacher. So what do you think about this herb? The 21 in my email is because I tease everyone I’m 21 (but I’m really 73.Haha
Nigella sativa is a great herb. Black seed or black cumin are the common names. Arabs have a saying that it will cure anything but death. I’ll do a blog/video on it one of these days.
Is there a reason that you only use a 2′ wide board or can we use 3 or 4 foot board for the width?
Anything between 2 & 4 foot widths are great. Anything wider than that and it starts to get hard to reach the middle of the bed. :0)
My husband is going to be so mad that I saw this—I do love a raised bed! We have a hug in-ground garden, but there’s just something about a raised bed–we have many and I want more (especially for herbs!).
GREAT idea and tutorial–thank you!
Please don’t use new redwood for garden boxes, even though it is the best wood for this. California is losing our majestic redwood forests here and other wood can be used instead. Don’t trust “sustainable” labels on wood. Repurposed wood can be used if it is untreated as well as wood that is farmed.
Yayyy! Literally looking for a quick solution for our strawberry beds that need to be done this weekend, when i ran across this article while herb shopping. These corner blocks are perfect. Picking them up from my big box store tomorrow.